# Custom Fields
This guide explains how to create, update and delete custom fields. It will also explain how one can configure to autofill these custom fields in forms later.
# Create custom fields
To create a new custom field follow the the guide below:
Login into your account:
Edit entry:
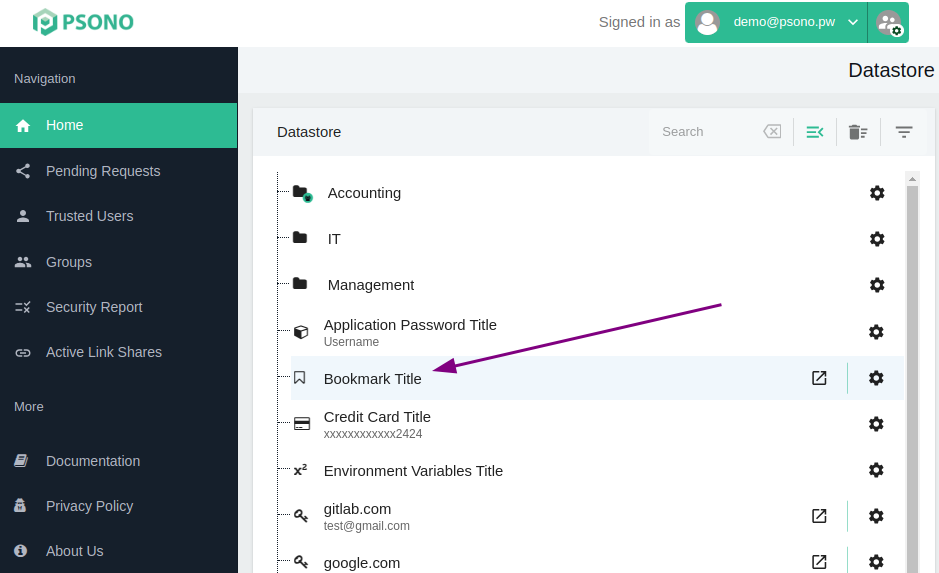
Click on the entry to edit it
TIP
Only website passwords, application passwords, bookmarks and notes support custom fields.
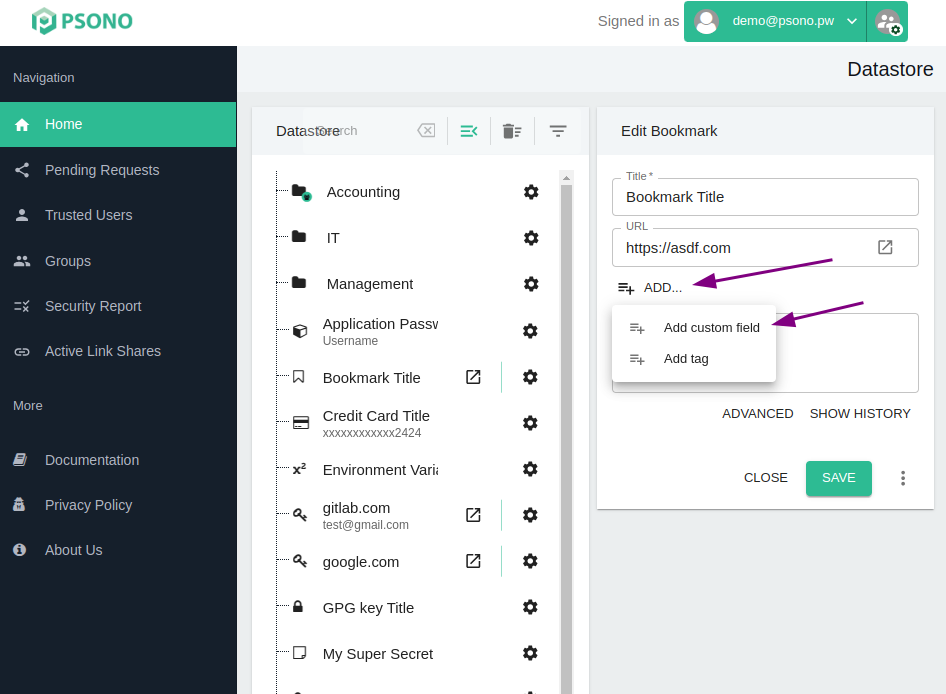
Add custom field:
Click on "Add" and then "Add custom field" to add a custom field
Configure custom field:
Choose a name and an appropriate type and hit
Save.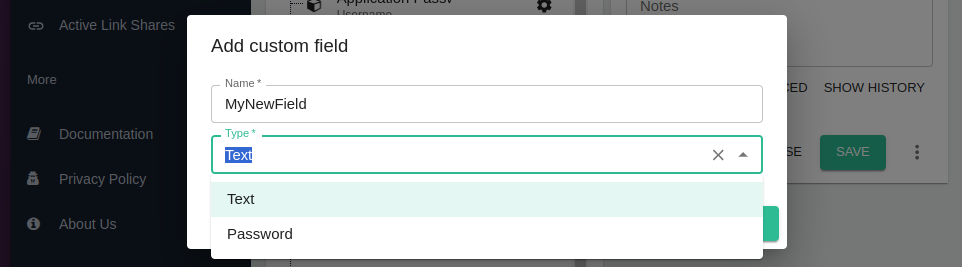
TIP
The name of the entry will later be used to match entries during autofill. The matching is done by the DOM's input element properties, namely its
id,name,aria-label,placeholderorlabel(in that order).Add a value:
Enter the value that you'd like to store with the custom field.

# Modify custom fields
You may want to change the name or type of a custom field.
Login into your account:
Edit entry:
Click on the entry to edit it
Modify custom field:
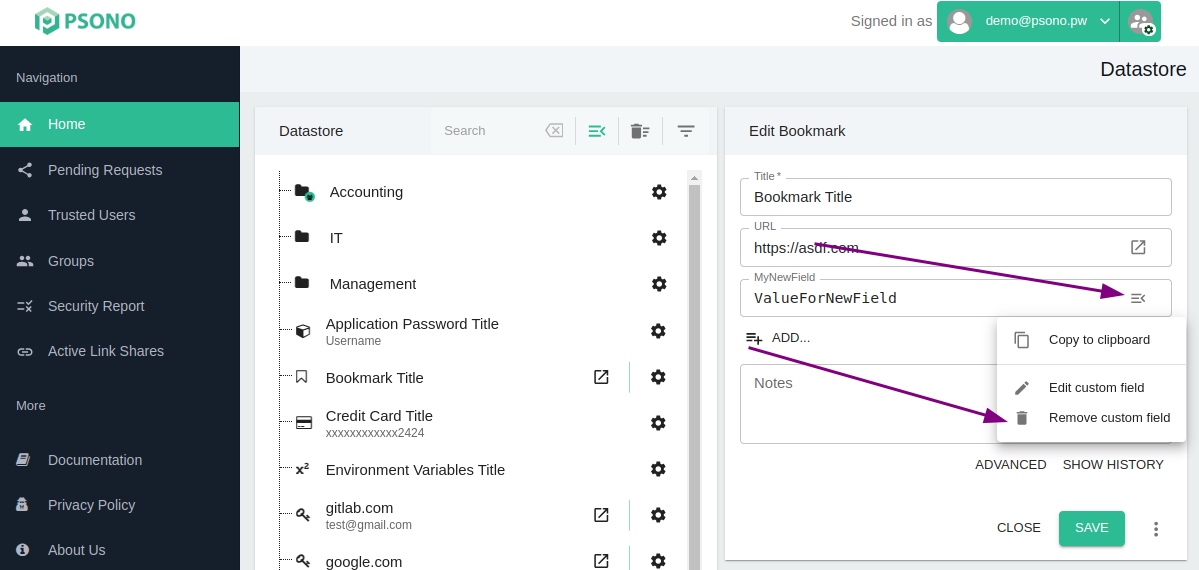
Choose the custom field that you'd like to edit. Use the burger menu on the right to open the menu and choose
Edit custom field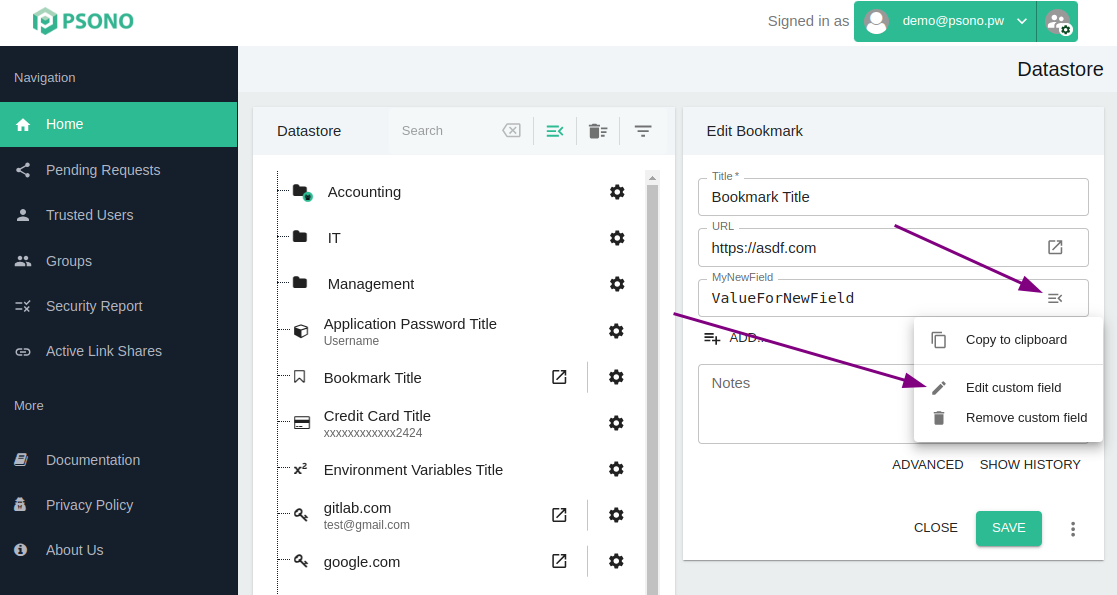
Configure custom field:
Configure the custom field accordingly and click
Save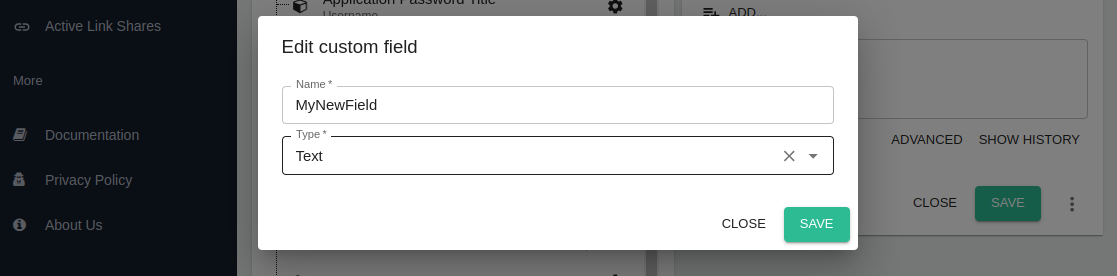
# Delete custom fields
If you may want to delete a custom field you can follow the guide below:
Login into your account:
Edit entry:
Click on the entry to edit it
Modify custom field:
Choose the custom field that you'd like to edit. Use the burger menu on the right to open the menu and choose
Remove custom field