# Keycloak as IDP for SAML-SSO
To set up the IDP you need a running instance of Keycloak with a configurable realm. Let's pretend it is called my_realm.
# Preamble
The EE server and client support the SAML protocol that allows you to configure an external service as IDP (identity
provider) for SSO (single sign on). This guide here will explain how to configure Keycloak as SAML-IDP for SSO. We
assume that your Keycloak instance is running on https://keycloak.example.com, your webclient on
https://psono.example.com and finally the server is reachable with https://psono.example.com/server (e.g.
https://example.com/server/info/ shows you some nice json output). This is your first SAML provider that you want to
configure (therefore we give him the ID "1").
TIP
This feature is only available in the Enterprise Edition.
# Keycloak
Navigate to your realm and click on
Createin theClients-Section.In there add your new client like shown below
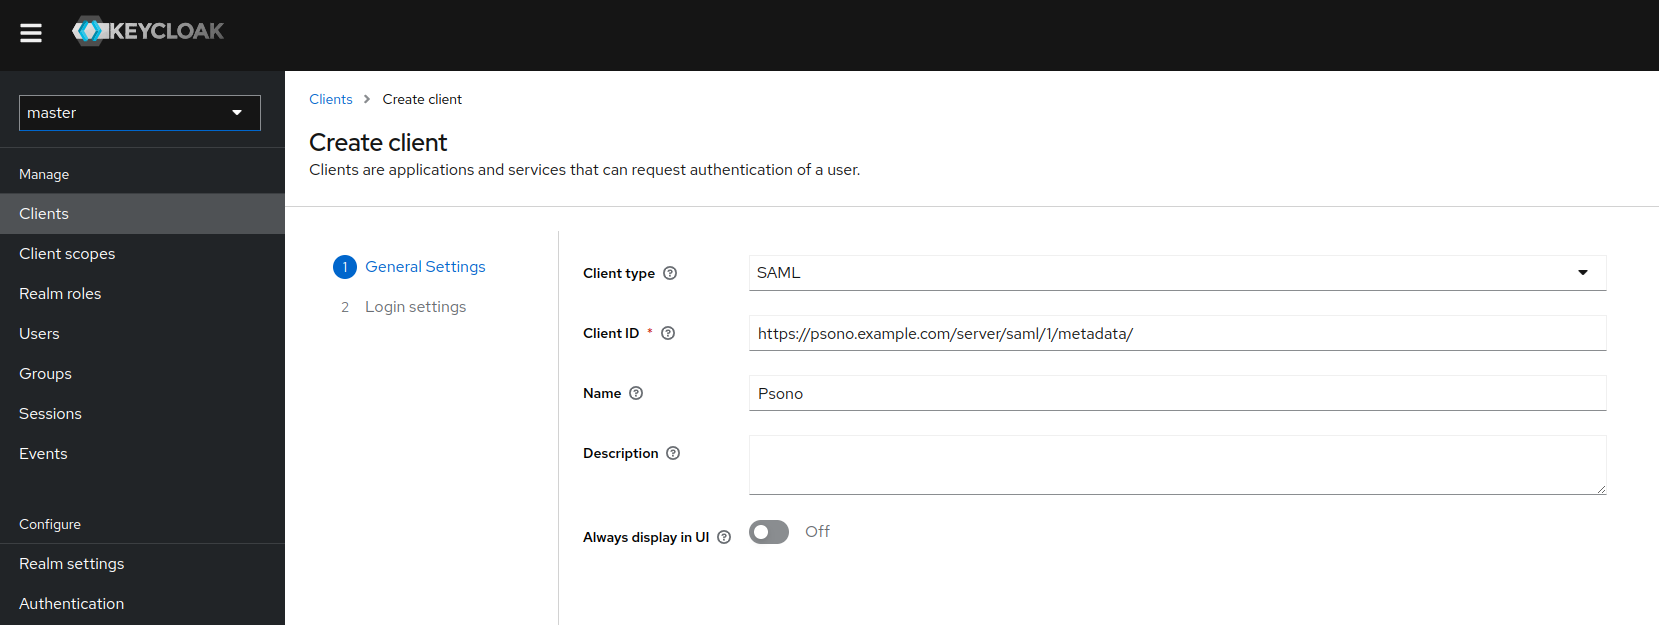
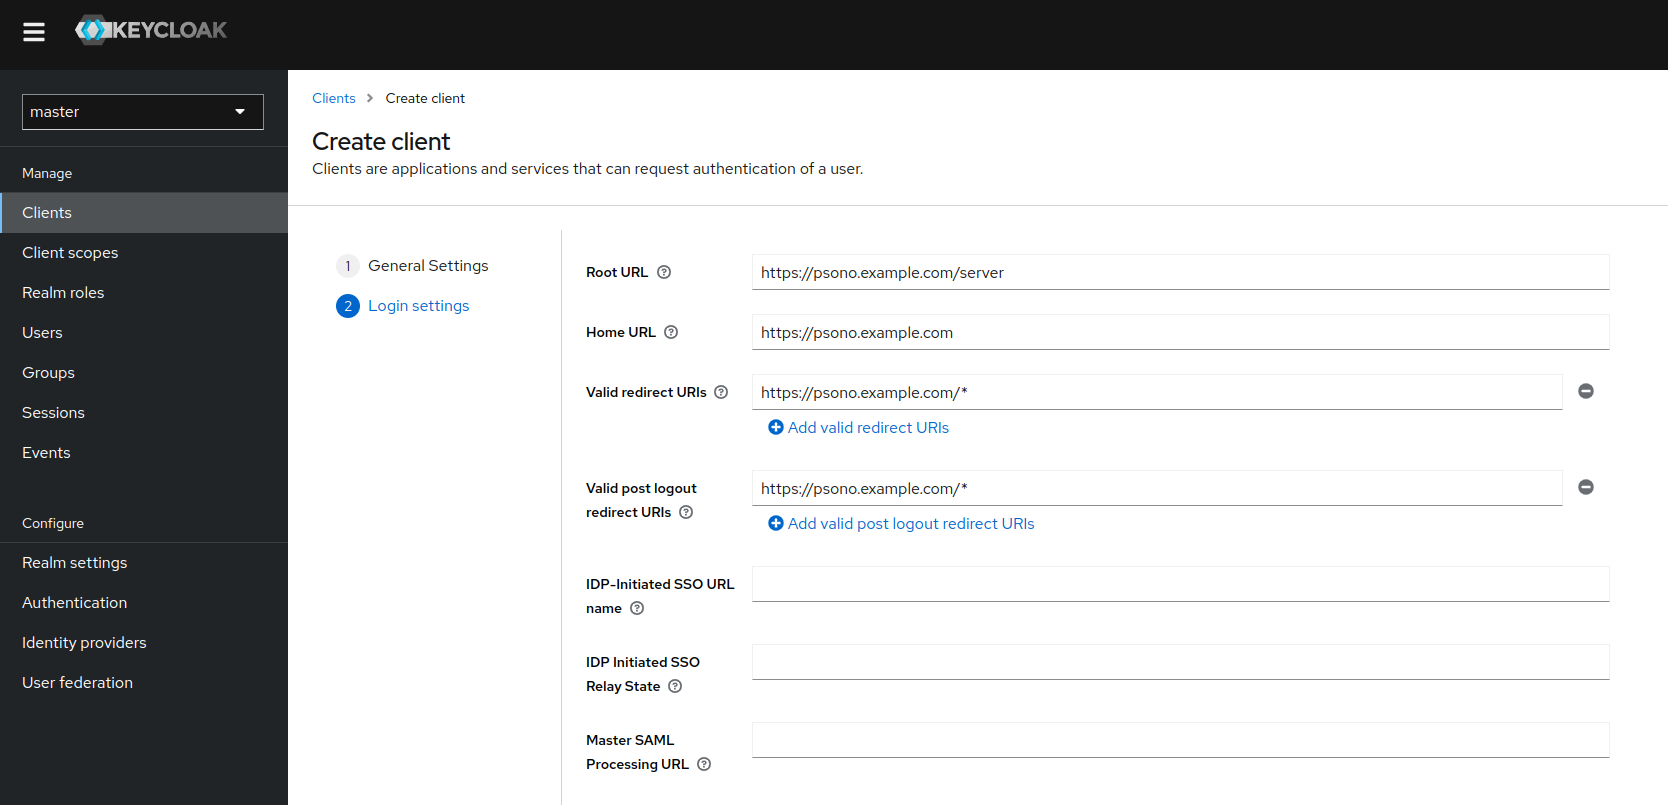
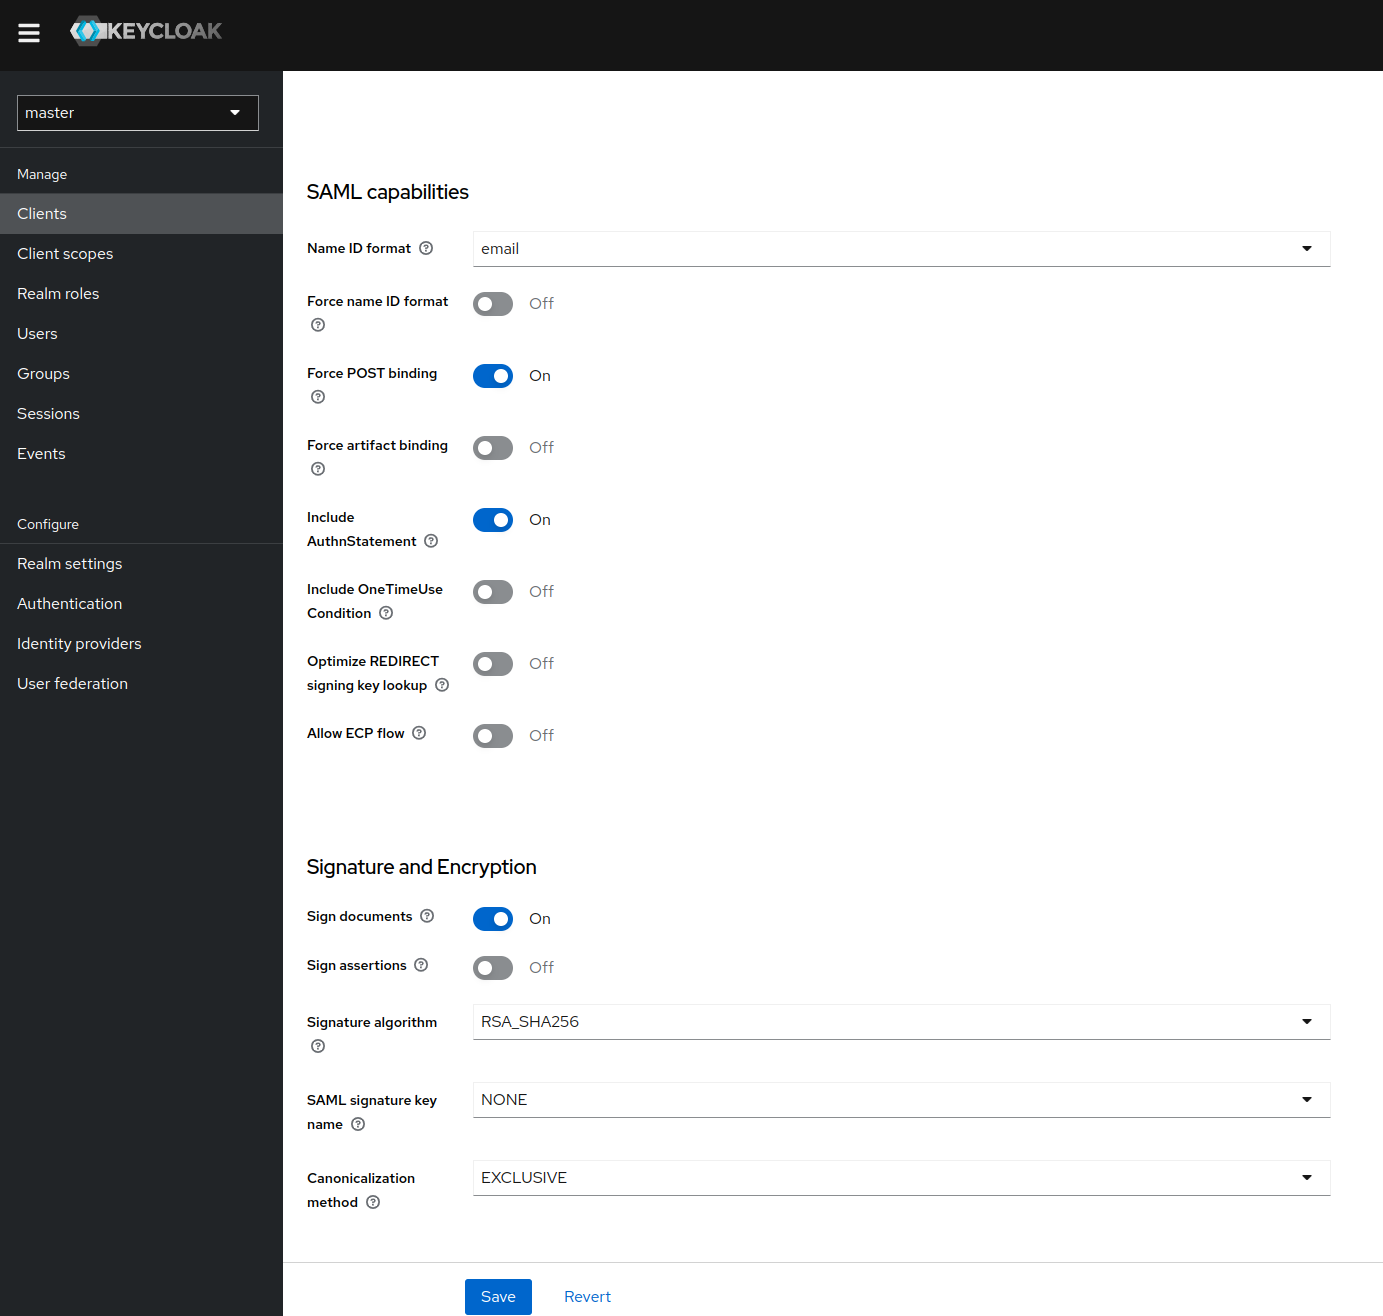
Afterwards adapt the settings of the client. Don't forget to click on save at the bottom of the page.
Choose "email" as your Name ID Format.
Now a new tab called
Keysshould show up. Go there and copy the certificate (5) and private key as .p12 for the later use.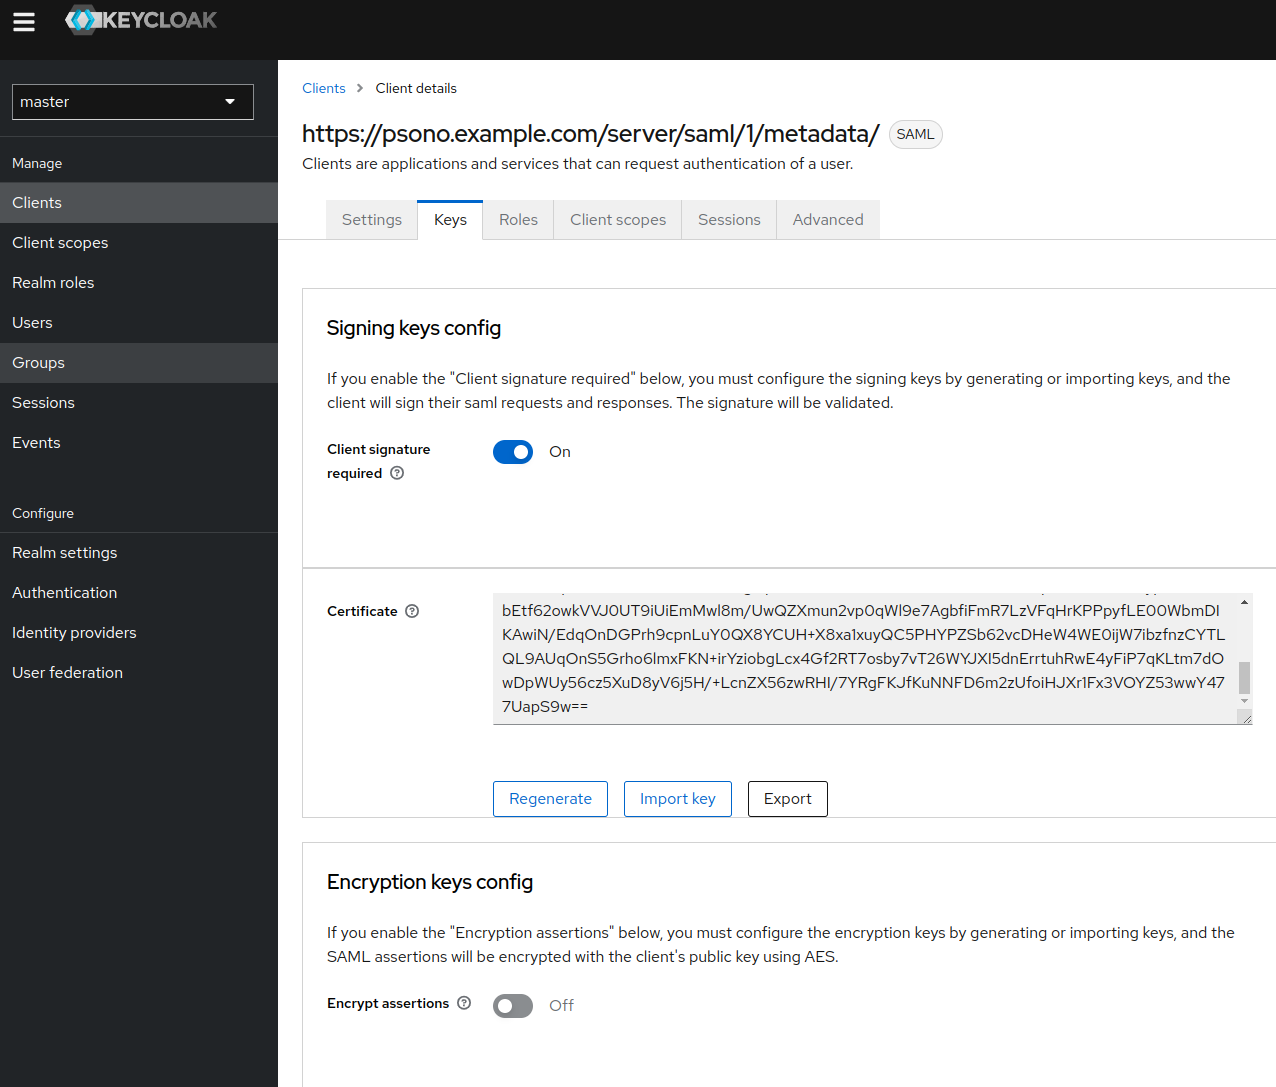
Extract private key
Use the following command to extract the private key (6) from the .p12 file
openssl pkcs12 -in keystore.p12 -out key.pem -nocerts -nodesIn the
Client Scopes-tab click on theDedicated scope and mappers for this clientscope.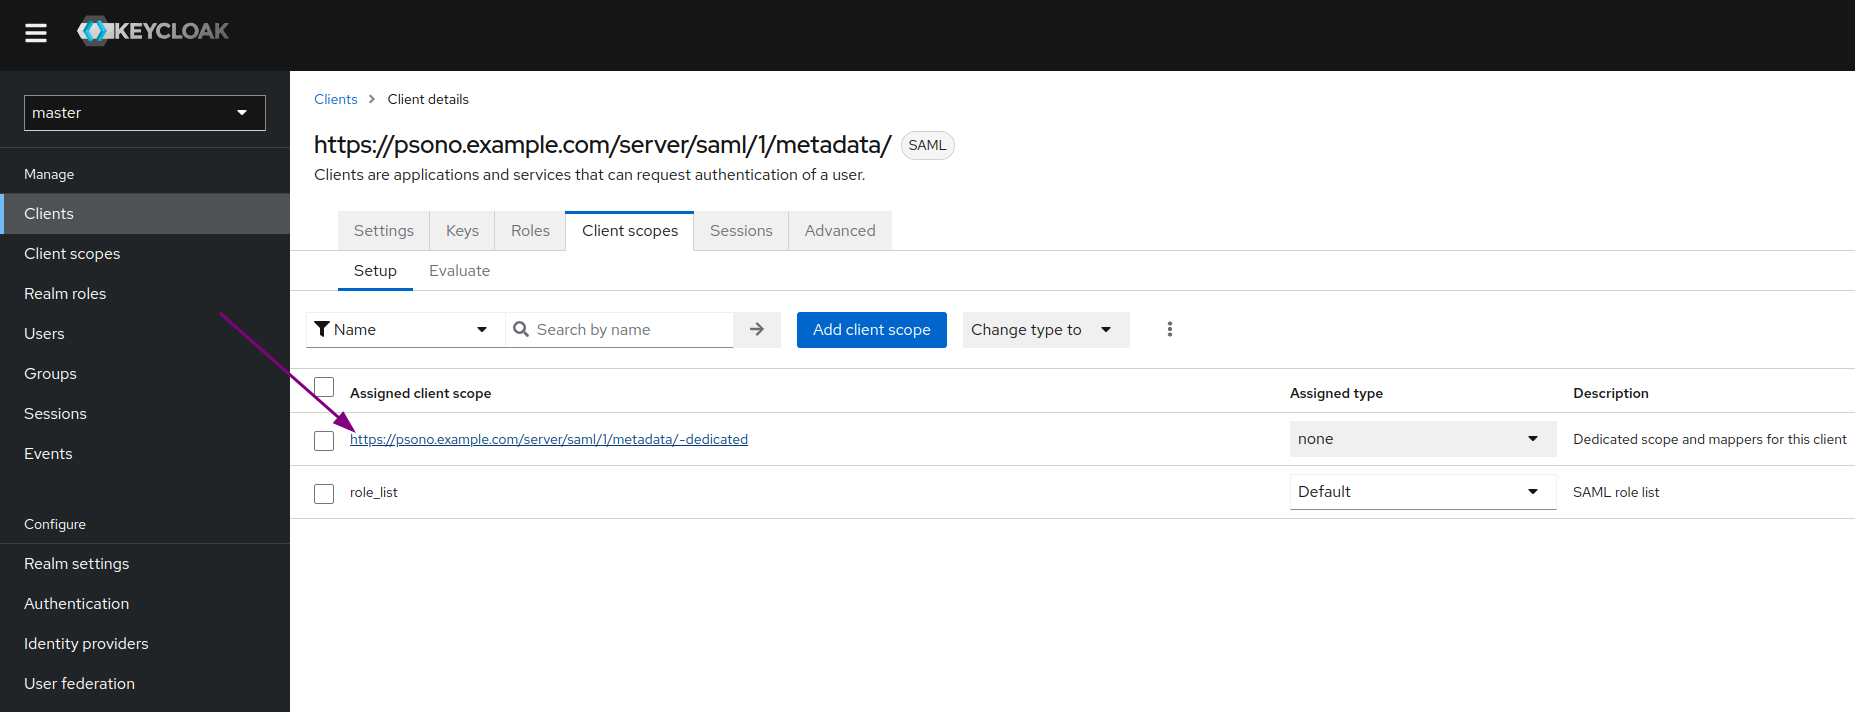
Leave
role_listas is, so the roles are also passed along.Next in the
Mappers-tab click onAdd predefined mapper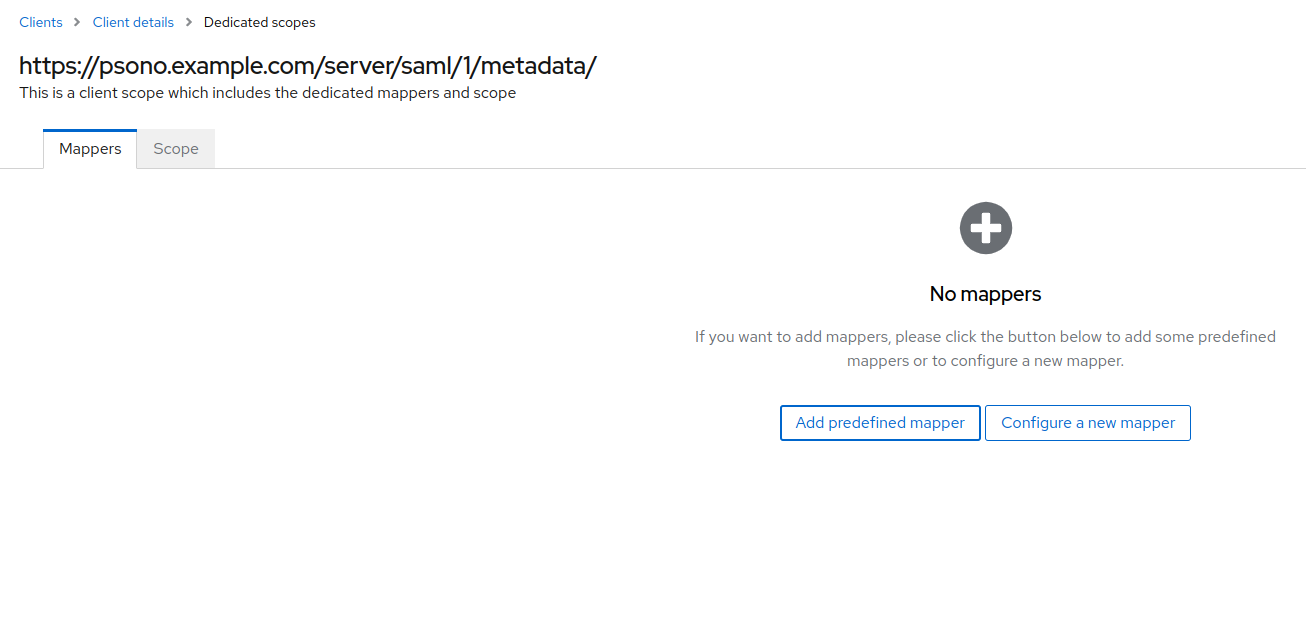
Select
X500 email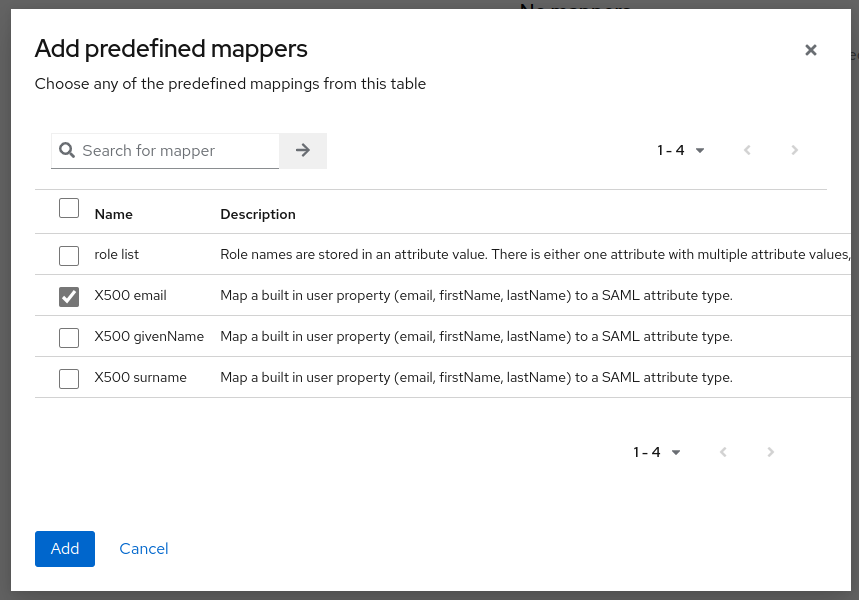
Within my_realm go to the
Realm Settings-section and then in theKeys-tab. Depending on you choice for (2) copy the certificate (9).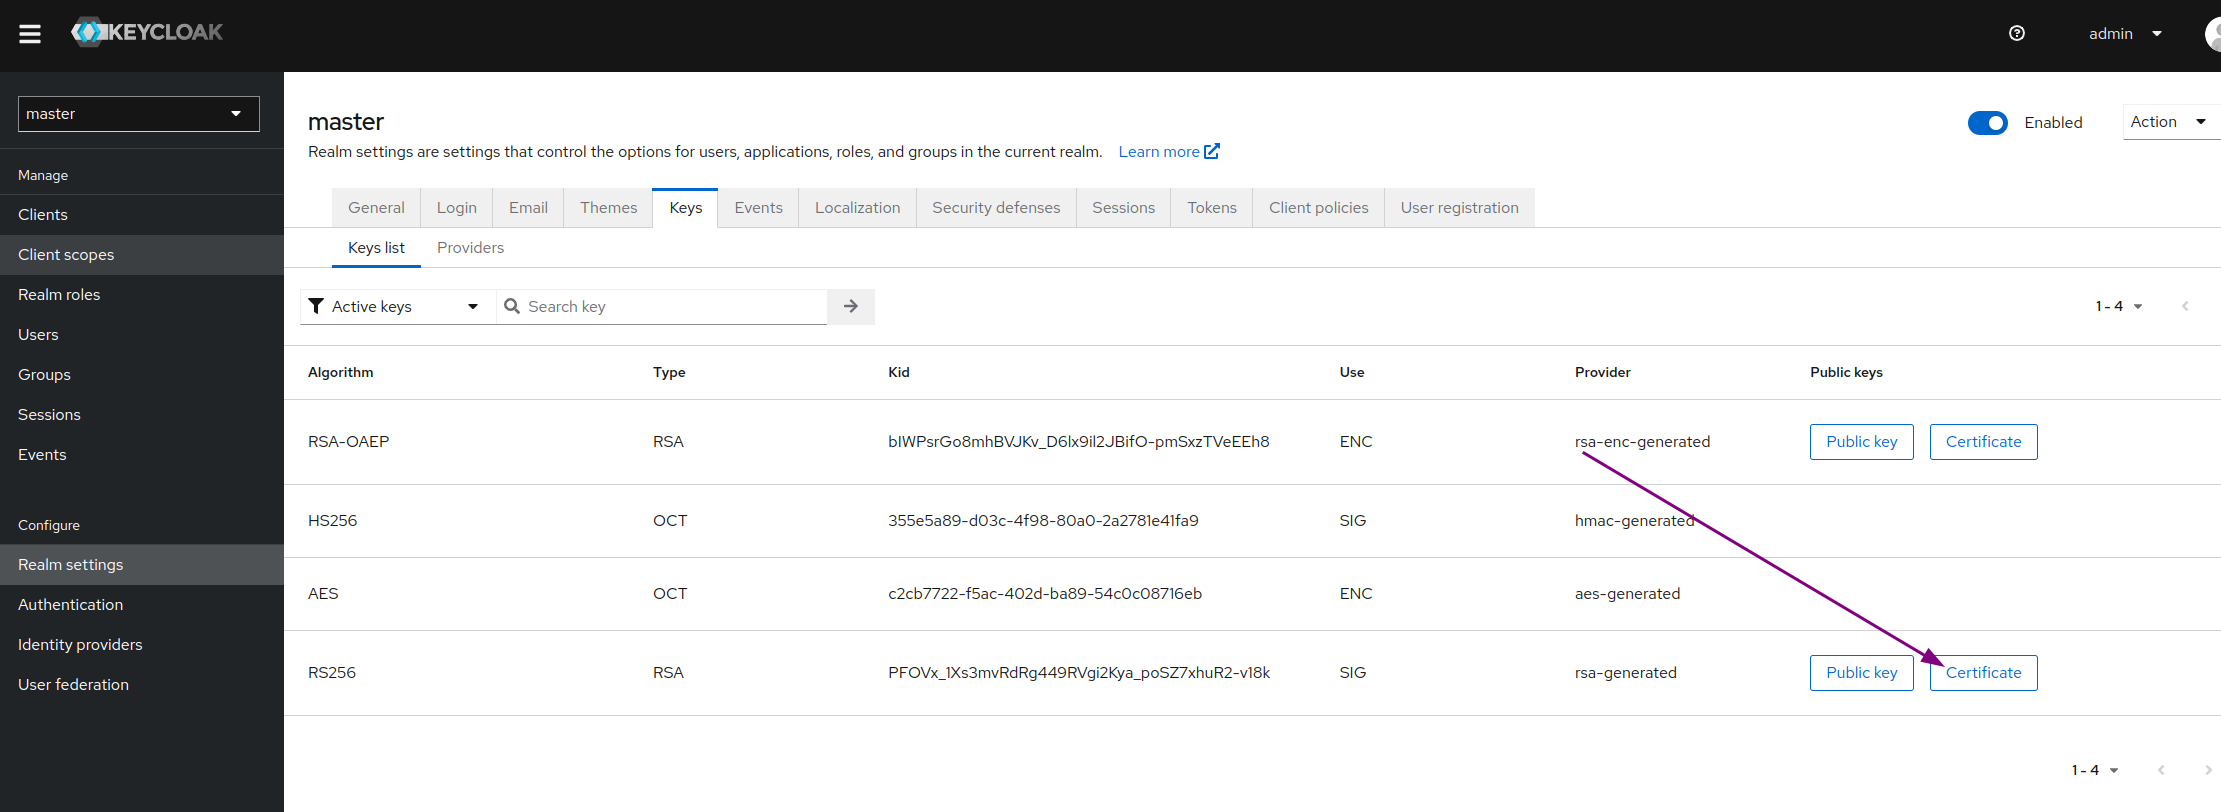
# Server (settings.yaml)
After setting up the IDP for the SAML-Authentication it is time to configure your running Psono server to act as the SP. It is required that Psono can reach Keycloak and vise versa.
- Change or add SAML configuration in to settings.yaml.
SAML_CONFIGURATIONS:
    1:
        idp:
            entityId: "https://keycloak.example.com/realms/my_realm"
            singleLogoutService:
                binding: "urn:oasis:names:tc:SAML:2.0:bindings:HTTP-Redirect"
                url: "https://keycloak.example.com/realms/my_realm/protocol/saml"
            singleSignOnService:
                binding: "urn:oasis:names:tc:SAML:2.0:bindings:HTTP-Redirect"
                url: "https://keycloak.example.com/realms/my_realm/protocol/saml"
            x509cert: "{certificate from (9)}"
            groups_attribute: "Role"
            username_attribute: "urn:oid:1.2.840.113549.1.9.1"
            email_attribute: "urn:oid:1.2.840.113549.1.9.1"
            username_domain: "example.com"
            # If you have only certain user that may access Psono, create a role, put it in here and assign it to the users.
            required_group: ["Psono Role"]
            is_adfs: false
            honor_multifactors: true
            max_session_lifetime: 86400
        sp:
            entityId: "https://psono.example.com/server/saml/1/metadata/"
            NameIDFormat: "urn:oasis:names:tc:SAML:2.0:nameid-format:persistent"
            clientId: "https://psono.example.com/server/saml/1/metadata/"
            assertionConsumerService:
                binding: "urn:oasis:names:tc:SAML:2.0:bindings:HTTP-POST"
            attributeConsumingService:
                serviceName: "Psono"
                serviceDescription: "Psono EE password manager"
                requestedAttributes:
                    -
                        attributeValue: []
                        friendlyName: ""
                        isRequired: false
                        name: "email"
                        nameFormat: ""
            x509cert: "{certificate from (5)}"
            privateKey: "{private key from (6)}"
            singleLogoutService:
                binding: "urn:oasis:names:tc:SAML:2.0:bindings:HTTP-POST"
            autoprovision_psono_folder: false
            autoprovision_psono_group: false
        strict: true
        # You can configure the settings in `advanced_settings.json` of python3-saml in this node (see https://gitlab.com/esaqa/psono/psono-server/-/issues/153#note_443264234)
        security:
            authnRequestsSigned: true
TIP
Always restart the server after making changes in the setting.yml-file.
Adjust authentication methods
Make sure that
SAMLis part of theAUTHENTICATION_METHODSparameter in your settings.yaml e.g.AUTHENTICATION_METHODS: ['SAML']Restart the server afterward
(optional) Server Secrets
By default the server will keep a copy of the user's secret keys to allow people to login without a password. If you want true client side encryption and as such force users to enter separate password for the encryption you specify the following in your settings.yaml. You can also decide later and change that and migrate users during the login or apply this setting only to particular users or groups with policies in the Admin Portal.
COMPLIANCE_SERVER_SECRETS: 'noone'WARNING
If a user loses his password he will lose all his data.
(optional) Debug Mode
It is helpful in the later debugging to enable debug mode.
DEBUG: TrueWARNING
Restart the server afterward and don't forget to remove it before going to production.
# Client (config.json)
Now you have to configure your client, so your users can use this configured IDP.
Basic
Update your config.json similar to the one shown below.
{
  ...
    "authentication_methods": ["SAML"],
    "saml_provider": [{
      "title": "SAML Login",
      "provider_id": 1,
      "button_name": "Login "
    }]
  ...
}
The variable authentication_methods restricts the allowed login methods. In the example above only SAML will be allowed and the normal login "hidden". The title and button_name can be adjusted however you like. The
provider_idneeds to match the one that you used on your server.(optional) Automatic login
You may want to "automatically" click on the login button to initiate the login flow. You can accomplish this by modifying the config.json as shown below:
{
  ...
    "authentication_methods": ["SAML"],
    "auto_login": true,
  ...
}
WARNING
This will only work if you have just one provider configured with only one authentication method. Users won't be able to modify the server url nor choose to register or interact with the login form in any other way.
