# LDAP Group Mapping
# Preamble
The EE server supports the LDAP protocol that allows you to configure an external LDAP service for authentication. In addition the LDAP server may provide groups. This guide here will explain how to map a LDAP group to a Psono group. We assume that you already have configured LDAP correctly with the necessary attribute configuration, so groups are transferred proper. If not please check out the appropriate configuration guide.
TIP
This feature is only available in the Enterprise Edition.
# Admin Webclient
Login to the Admin webclient
Sync LDAP Groups
Go to
LDAP->Groupsand click theSYNC WITH LDAPbutton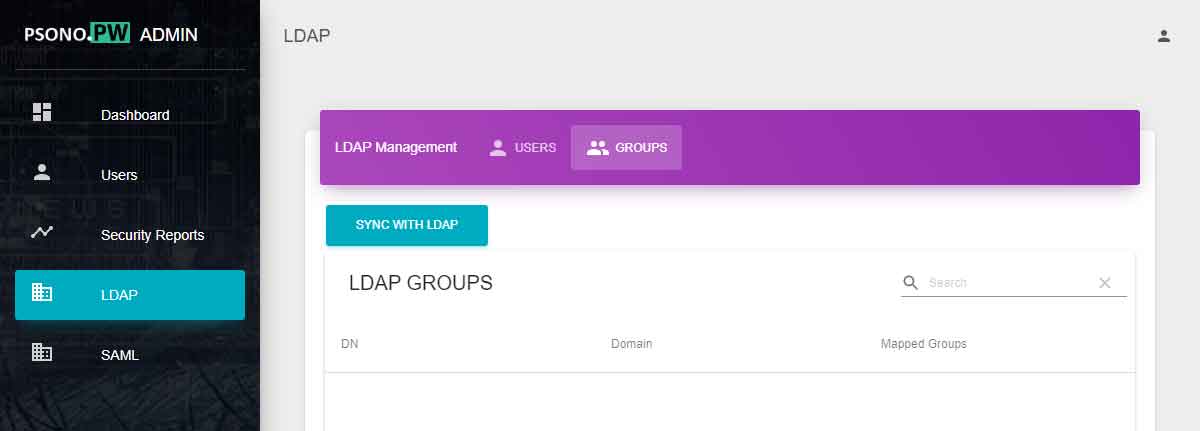
Create Managed Group
Go to
Groupsand click the+button to create a managed group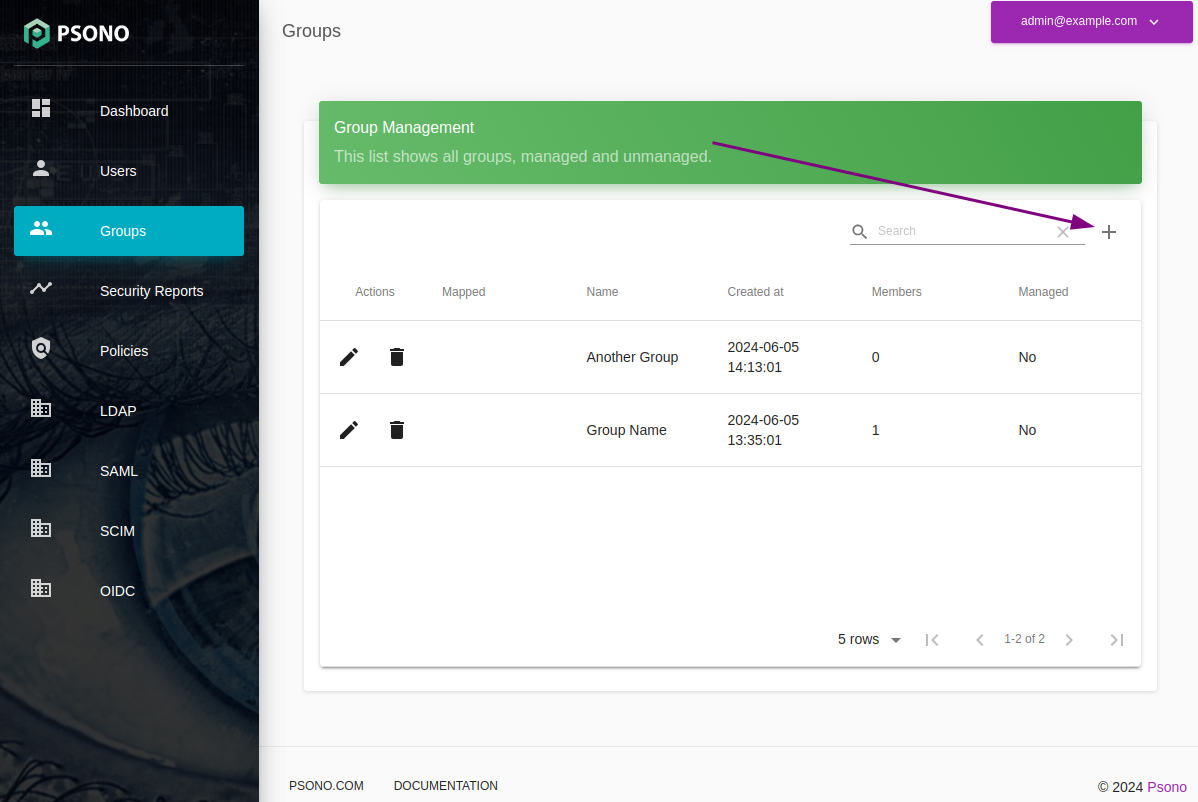
Edit Managed Group
Go to
Groupsand click thepencilbutton next to the created group
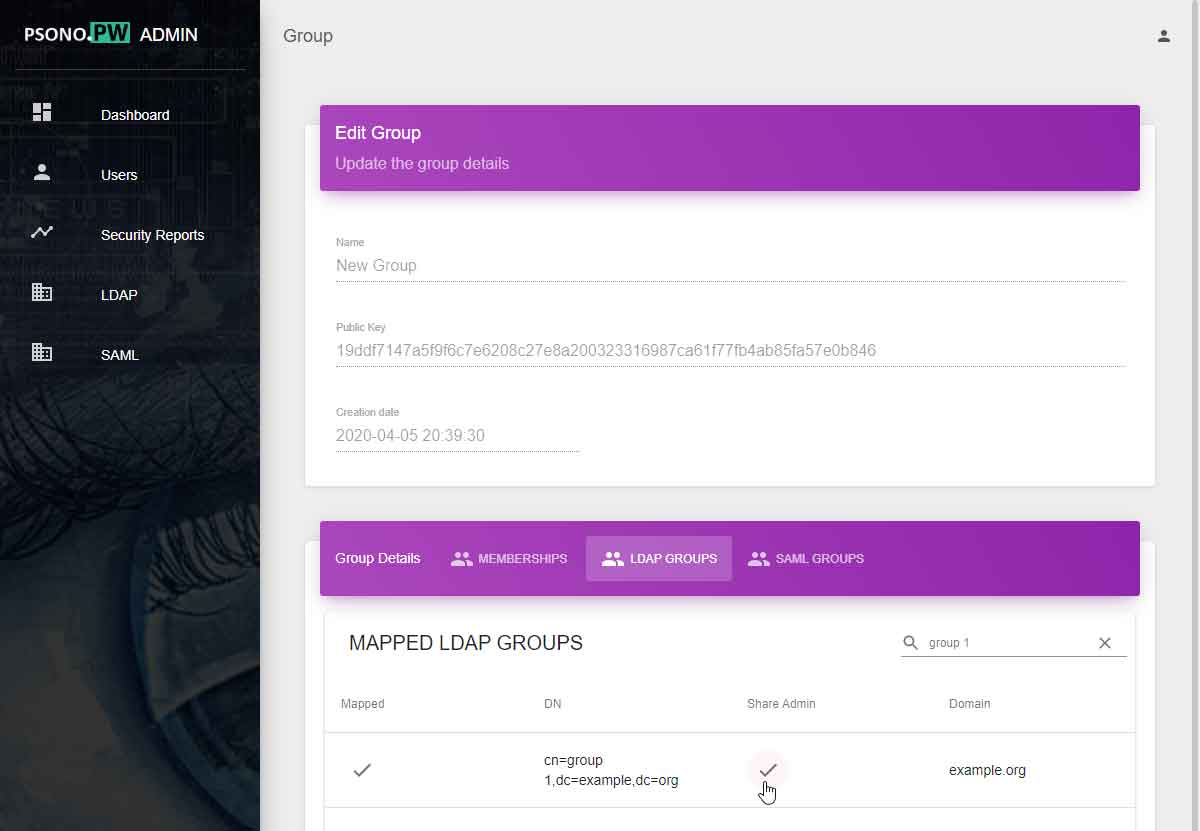
Create Mapping
Search for the LDAP group and click the checkmark symbol in the "Mapped" column.
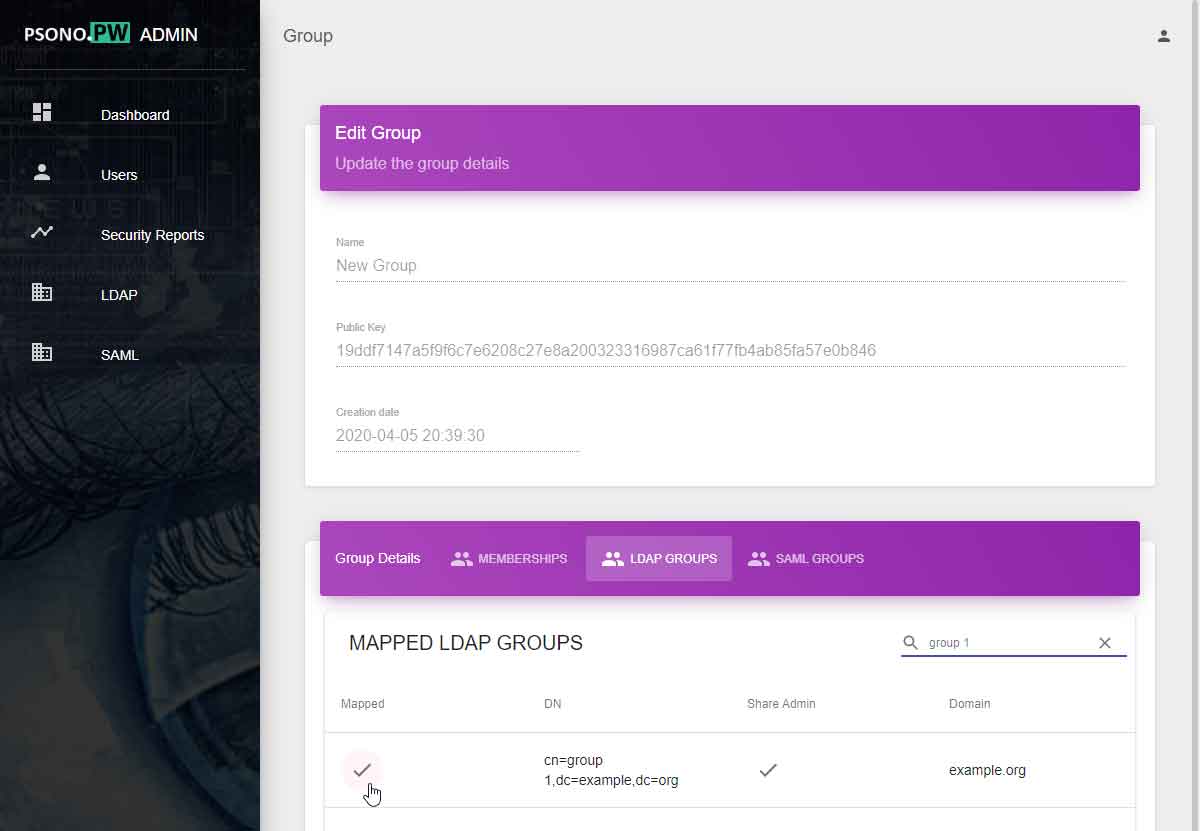
(optional) Grant Share Admin
If you want to allow users of this LDAP group to add new shares to this group, you have to grant them Share Admin.
TIP
It is considered best practise to share only one folder per group and add new entries or subfoldes to that one shared folder. That way all shares are instant and noone has to accept new shared secrets.
Finished
Whenever a user logs in with LDAP, the server will map Psono groups according to the user's LDAP groups and grant the user the necessary permissions. If a user loses access to a group the server will remove the user from the Psono group upon next login.